Mapboxのルート
ユーザーの位置を取得するのに、Route サービスを使用して、ルートを作成できる。 出発地、目的地の情報をコールバックに渡して、応答を処理する。 onResponse関数内では、方向情報のレスポンスに基づいて地図上にルートを描画したり、時間と距離を表示したりすることができる。
例

iOS
マップ上にルートを設定するには、出発地と目的地の2つポイントを送信する必要である。 その後、‘NavigationRouteOptionsクラスを使って、地図上に表示するルートを生成する。
例
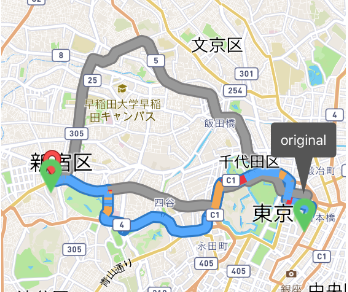
東京駅(ロケーション:35.681461、139.766357)と新宿駅(35.690156、139.700413)間のルートを検索するために、下記のように行う。
1.	import MapboxDirections
2.	import MapboxCoreNavigation
3.	import MapboxNavigation
4.	…
5.	// Define two waypoints to travel between
6.	let origin = Waypoint(coordinate: CLLocationCoordinate2D(latitude: 35.681461, longitude: -139.766357), name: "Tokyo Station")
7.	let destination = Waypoint(coordinate: CLLocationCoordinate2D(latitude: 35.690156, longitude: 139.700413), name: "Shinjuku Station")
8.
9.	// Set options
10.	let options = NavigationRouteOptions(waypoints: [origin, destination])
11.
12.	// Request a route using MapboxDirections.swift
13.	Directions.shared.calculate(options) { (waypoints, routes, error) in
14.	    guard let route = routes?.first else { return }
15.	    // Pass the generated route to the the NavigationViewController
16.	    let viewController = NavigationViewController(for: route)
17.	    present(viewController, animated: true, completion: nil)
18.	}
Mapbox Directions
DirectionはMapboxナビゲーションの機能である。方向機能を簡単に実装できるようにサポートする。
iOS
方向機能を実装するには、ポイントリスト(開始点と終了点を含む)が必要である。 Mapbox NavigationでのDirectionsクラスを使用してルートを計算し、結果をMapbox SDK iOSから提供されるNaviagtionViewControllerに設定する。
例
1.	@IBAction func handleDirectionStartTouch(_ sender: Any) {
2.	        let options = NavigationRouteOptions(coordinates: [self.mapViewModel.annotationOriginal!.coordinate, self.mapViewModel.annotationDestination!.coordinate])
3.
4.	        Directions.shared.calculate(options) { (waypoints, routes, error) in
5.	            guard let route = routes?.first, error == nil else {
6.	                print(error!.localizedDescription)
7.	                return
8.	            }
9.
10.	            // For demonstration purposes, simulate locations if the Simulate Navigation option is on.
11.	            let navigationService = MapboxNavigationService(route: route, simulating: false ? .always : .onPoorGPS)
12.	            let navigationOptions = NavigationOptions(navigationService: navigationService)
13.	            let navigationViewController = NavigationViewController(for: route, options: navigationOptions)
14.	            navigationViewController.mapView?.delegate = self
15.
16.	            self.present(navigationViewController, animated: true, completion: nil)
17.	        }
18.	    }
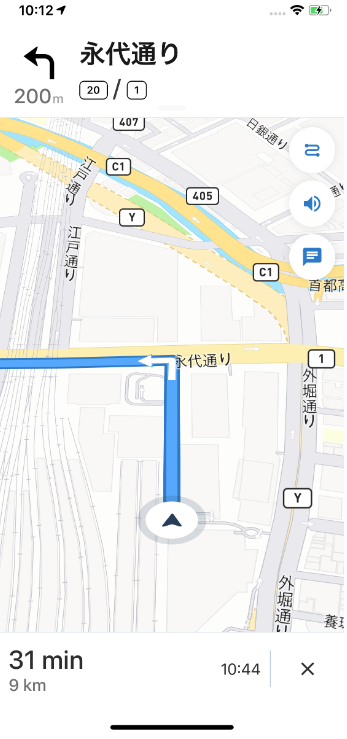
備考
デフォルトとしてNavigationViewController内の地図は道路ラベルをローカル言語で表示しますが、対象する場所のポイントがシステムの優先言語で表示されている。(その言語は、Mapbox Streets sourceがサポートされている8つの言語の中にある)。 ユーザーが設定、全般設定、及び言語と地域でシステムの優先言語を設定できる。
スタンドアロンのNavigationMapViewでは、道路ラベル、関心地点、場所などが現行のスタイルで言語を指定する。 (デフォルトのMapbox Navigation Guidance Day v2スタイルは英語を指定する。)NavigationViewController内のマップの動作を一致させるには、MGLMapViewDelegate.mapView(_:didFinishLoading:):
内からNavigationMapView.localizeLabels() メソッドを呼び出す。
例
1.	func mapView(_ mapView: MGLMapView, didFinishLoading style: MGLStyle) {
2.	    if let mapView = mapView as? NavigationMapView {
3.	        mapView.localizeLabels()
4.	    }
5.	}